
Bicycle maintenance guide: How to remove and install freewheels and cassettes
Posted on in Cycles News
Removing and installing your sprockets isn't too difficult, but first you need to know which type you're dealing with.
 There are a number of reasons why you'd need to remove or replace the set of sprockets on your bike, whether it's because they're worn, you're going for a whole new groupset, you need to replace a broken spoke or whether you just want to give them a good ol' soak in degreaser.
However, they don't all come off in the same way. Sprockets can be fixed to the rear hub in one of two ways, either by a freewheel system or a cassette system.
Graeme, Cytech trainer and assessor for Torq Zone Academy in South Africa, is here to help discuss the differences, how to tell them apart and how to remove and install them.
Freewheels vs. Cassettes
A freewheel system (pictured left) is a collection of sprockets with an integrated coasting mechanism, which is threaded onto the hub as a whole. With a cassette system (pictured right), the coasting mechanism is separate from the sprockets and fitted to the hub itself, where the collection of sprockets are then fitted onto this.
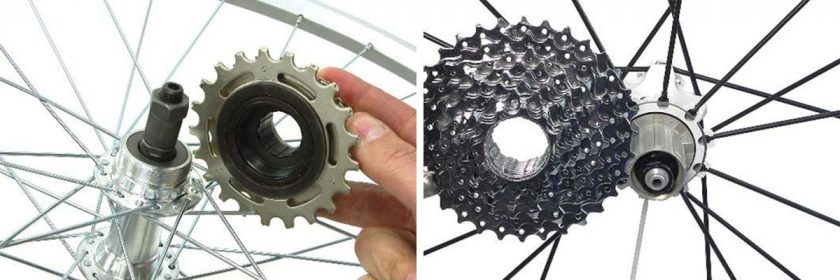
Photos: Park Tool
When fitted on a bike the two systems look very similar, but removing them requires slightly different processes and tools. Determining which system your bike has is easier than imagined, but crucial in determining the tool for the removal.
So, which is which?
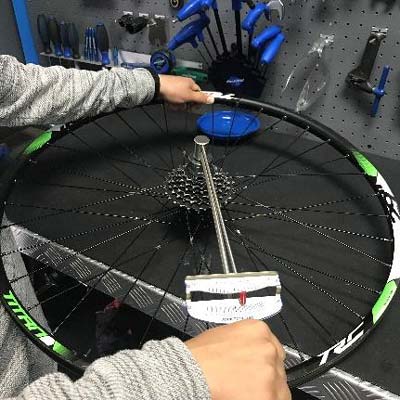
First, it's best to remove the rear wheel, and then take a look at your hub, more specifically around your hub axle. You're looking for tool fittings around the outside of the hub axle.
Give the sprockets a spin to the left (backwards) and watch to see if the tool fittings are spinning with the sprockets or not. If the tool fittings are stationary then the hub is fitted with a freewheel, and if the tool fittings rotate with the sprockets then the hub is fitted with a cassette. Park Tool has created some handy GIFs to illustrate
Before starting with the removal thereof you need to determine what brand or style of freewheel or cassette you have in order to get the right removal tool (which is very important). For this it’s best to either check the manual or seek the advice of a qualified bike mechanic since there are many variations!
Removal
For removal, you will need the correct removal tool mentioned above, and if you have a cassette you will also need a chain whip.
Freewheels:
1. If you have access to a bench vice, clamp the removal tool into it.
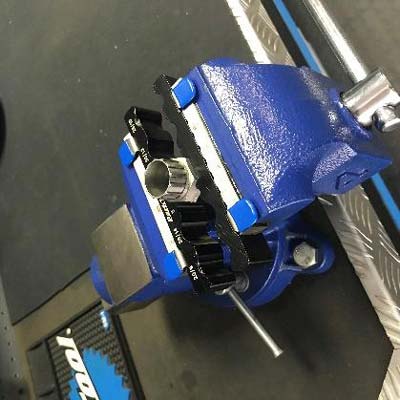
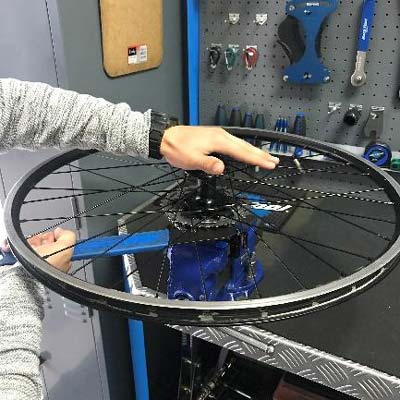
2. Place the tool fittings of the freewheel onto the removal tool and turn the wheel in an anti-clockwise direction. Continue to turn until the freewheel threads off the hub.
If you don't have a vice then this can also be done with the wheel
upright on the floor, placing the removal tool in the freewheel and
using a spanner to turn anti-clockwise.

Cassettes:
1. Like with the freewheels, clamp the removal tool in a bench vice and place the tool fittings of the cassette onto the removal tool.
2. Wrap the tail of a chain whip clockwise around the second or third largest sprocket, push down on the hub and pull anti-clockwise on the chain whip until the cassette lockring is loose.
Expect to hear a loud clicking sound as the locking teeth of the lockring separate.
3. Place the wheel back onto the work surface and unstack the cassette off the freehub body noting the order of the sprockets and spacers.
Installation
Freewheels:
1. Place a little anti-seize compound onto the internal thread of the freewheel.
2. Using your hand, thread the freewheel onto the hub turning in a clockwise direction.
Cassettes:
1. Pack the cassette onto the freehub body in the same order that it was removed-freehub bodies and cassettes are designed so that the sprockets will fit in only one way.
2. Place a little anti-seize compound onto the thread of the lockring.
3. Using your hands and the removal tool, which has been inserted into the tool fittings, thread the lockring into place.
4. With the removal tool still in place, again preferably using a torque wrench, tighten the lockring to the manufacturer's specifications.
Note: SRAM XD cassette systems are slightly different in the sense that there is no external lockring. Instead, the lockring mechanism is inside the cassette stack. Other than this point, removal and installation follow the same process for cassettes.
With your sprockets back on the bike you're ready to get going again! If you have any issues with the above or if you need to stock up on the right tools, then don't hesitate in getting in touch with your local bike shop!